
cPguard firewall is built on nftables, offering greater flexibility and performance compared to legacy iptables. Since it works at the system level, it operates independently of any control panel (including RunCloud). This ensures your server remains protected at all times. You can manage rules and settings directly through our firewall module.
The cPguard firewall includes powerful features such as IP and country-based whitelisting/blacklisting, extended rule imports, temporary bans with expiry, port filtering, DoS/SYN-flood protection, real-time IPDB integration, AI bot protection, and Fail2Ban support for service-level brute-force defense. These features ensure proactive security and complete control over inbound and outbound traffic. For each function, you can manage rules easily through the UI interface, or use CLI options, both of which are available for flexibility.
The Firewall settings and IP blacklist/whitelist and temporary bans can be managed directly from UI.
All tasks can also be performed via the CLI, and you can view the available options using the following commands:
cpgcli fw --help
cpgcli ip --help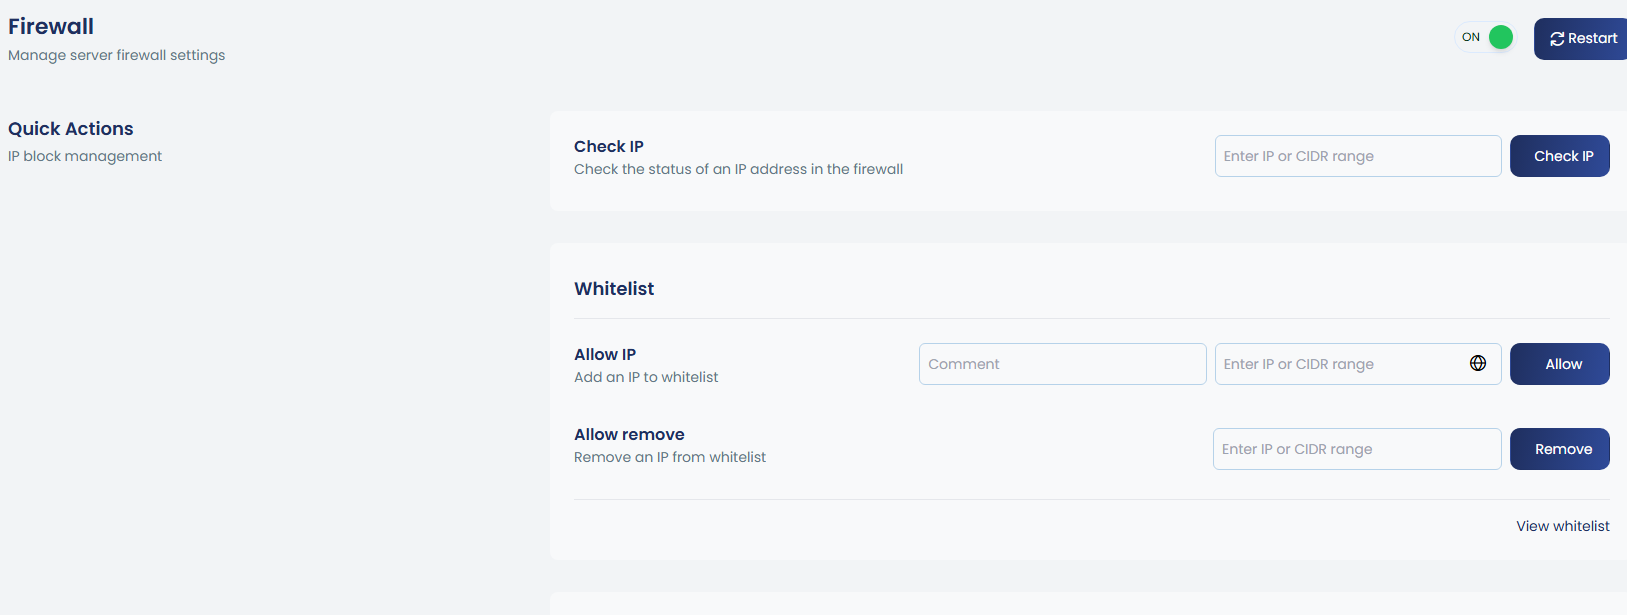
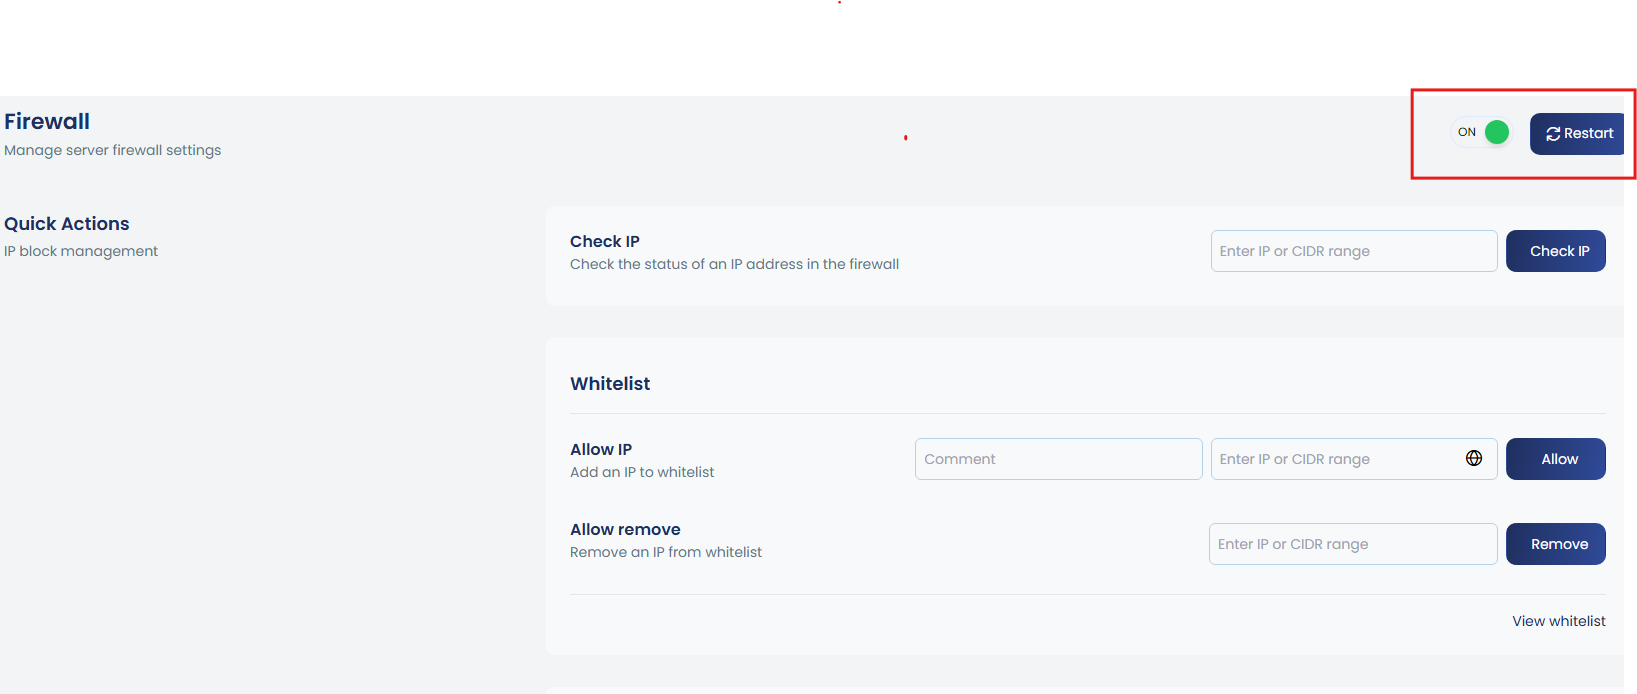
The firewall can be easily enabled or disabled using the toggle option, and restarts can also be initiated directly from the UI.
You can check status, enable, disable or restart the firewall module using the following command :
cpgcli fw --enable |
Enable Firewall on the server |
cpgcli fw --disable |
Disable Firewall on the server |
cpgcli fw --restart |
Restart Firewall on the server |
cpgcli fw -- debug |
|
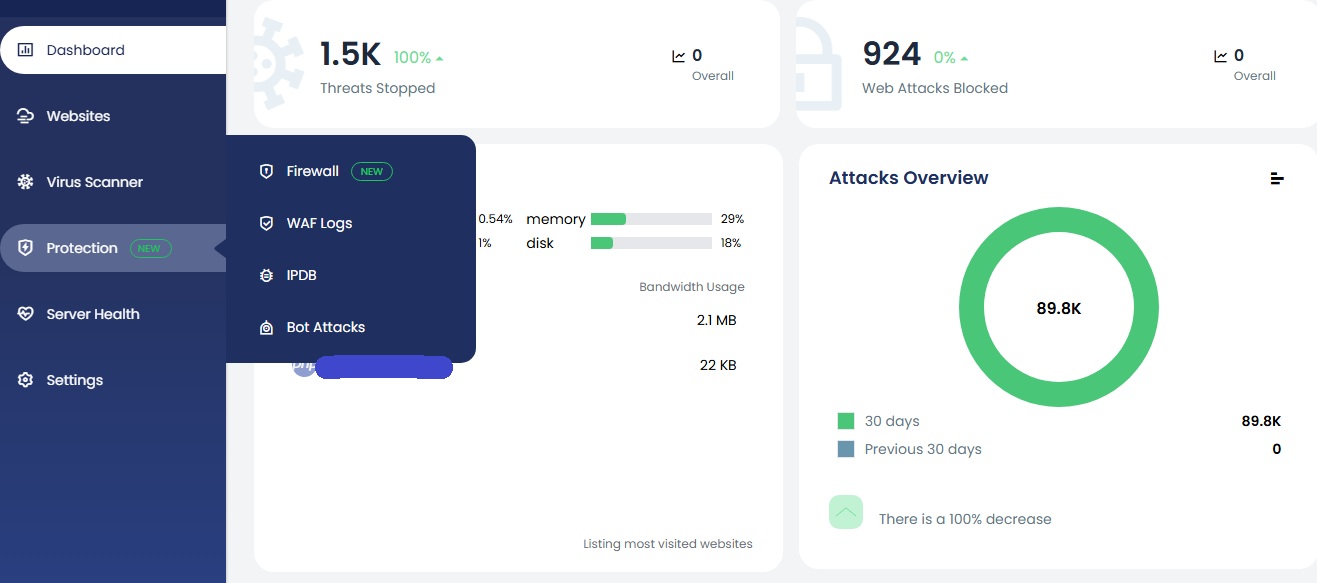
1. IP block management
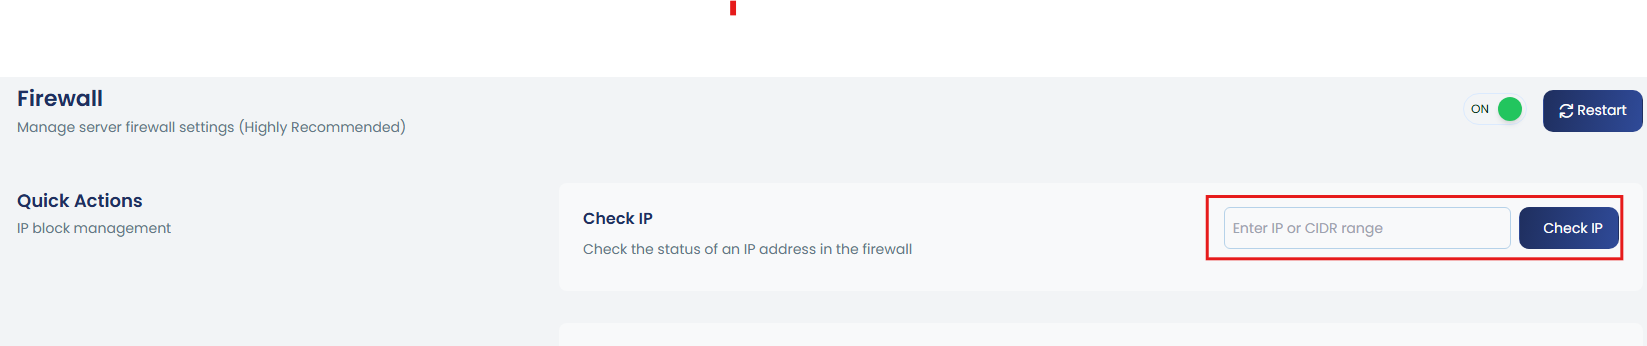
a. Check IP
To check if IP is in any firewall list, input the IP in the given box.
cpgcli ip --check IPb. Whitelist/Blacklist IP or CIDR:
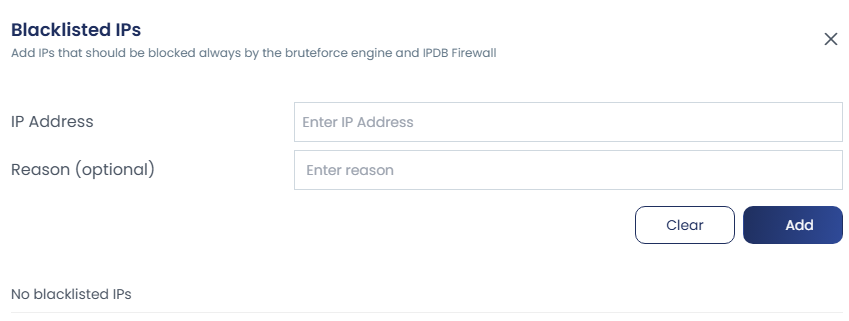
You can manage whitelist and blacklist IPs or CIDRs through the UI by entering the IP in the provided box, adding a reason in the comment section, and removing entries when needed.

To view all whitelisted and blacklisted IPs, there are options like “View Whitelist” and “View Blacklist.” By clicking these, you can see all the IPs added along with their reasons, and you also have the option to add new entries directly from this view.
Port-Based Whitelisting (--port)
The --port 'ports|protocol|direction' option allows you to apply granular whitelisting rules for specific IP addresses by controlling which ports, protocols, and traffic directions are allowed.
This is useful when you want to whitelist an IP only for certain services or traffic types, instead of giving it full access to the server.
This feature can also be configured through the interface. By clicking the up arrow near Allow, you will be prompted with Advanced Options. Inside this section, you can whitelist an IP for a specific port, protocol, and traffic direction, without applying a full whitelist. You will also be able to view the complete list of whitelisted IPs along with the reason or comment added for each entry, making it easy to manage and track your custom rules.


cpgcli ip --allow IP --reason 'reason to add' |
Add IP/CIDRs to whitelist (comma or space-separated). |
cpgcli ip --allow --remove IP1 IP2.. |
Renove IP/CIDRs from whitelist (comma or space-separated). |
cpgcli ip --allow --list |
List whitelist IP/CIDRs (comma or space-separated). |
cpgcli ip --port 'ports|protocol|direction' |
whitelisting ports(multiple seperated with commas)/protocol(optional)/direction(optional) for IP1 IP2. Supported protocols: tcp,udp Supported directions: in,out,inout–reason ‘reason or comment’ |
cpgcli ip --deny IP1 --reason 'reason to add' |
Add IP/CIDRs to blacklist (comma or space-separated). |
cpgcli ip --deny --remove IP1 IP2.. |
Remove IP(s) from blacklist. |
cpgcli ip --deny --list 'reason or comment' |
Add optional reason/comment for –allow and –deny. |
c. Temporary ban
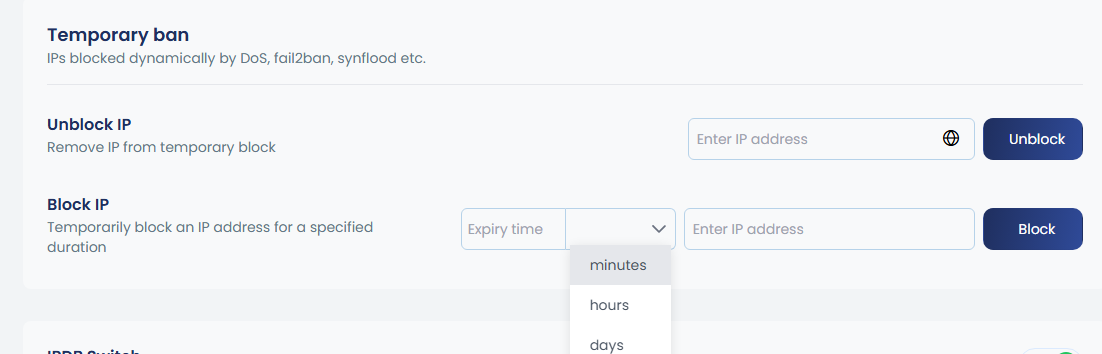
IPs may be temporarily blocked by DoS protection, Fail2Ban, SYN-Flood, etc. If you notice an IP is blocked, you can unblock it by entering the IP in the provided box and clicking Unblock. Default expiry is 24 hours.
If you want to temporarily block an IP, this can also be done from the Block IP section. Enter the IP, set the expiry time, and click Block. You can choose to block the IP for minutes, hours, or days as needed.
cpgcli ip --temp-ban IP <options> options --expiry values. Available values: m (minute), h (hour), d (day) --reason 'reason or comment' |
Temporarily ban IP(s) from accessing the server. |
cpgcli ip--temp-ban --remove IP |
Remove IP(s) from temporary ban list. |
cpgcli ip --temp-ban --list |
List all temporarily banned IPs. |
2. WAF Temporary ban
The WAF Temporary Ban feature enables you to temporarily block an IP address that triggers multiple WAF rules in a short period. This helps prevent automated attacks and reduce the burden on your server.
You can easily toggle this feature on or off:

| cpgcli fw –waf-ban enable|disable|status | Enable, disable or check WAF temporary ban status |
3. IPDB distributed firewall
The IPDB firewall can be managed from this section. You can turn it on or off using the toggle, and you can also enable or disable IPDB logging through the same toggle.

cpgcli fw --ipdb enable|disable |
Enable, disable or check IPDB integration. |
cpgcli fw --ipdb-log enable|disable |
Enable, disable or check IPDB logging. |
4. DoS Protection
To configure DoS protection, enable it using the toggle and enter the maximum requests allowed per minute in the provided box.

cpgcli fw --dos <options> options:enable|disable|status |
Enable, disable or check DOS protection status |
cpgcli fw --dos-threshold value |
Set/view maximum requests allowed per minute before blocking(integer) |
5. Configure AI bots
AI bot protection settings can be enabled by switching the toggle to On.

cpgcli fw --block-ai-bots <options> enable|disable |
Enable, disable or check AI Bots blocking status |
cpgcli fw --block-meta-bots <options> enable|disable |
Enable, disable or check Meta Bots blocking status |
6. Fail2ban
Fail2Ban settings can be enabled by switching the toggle to On.
Fail2Ban is a powerful security tool that helps protect your server from brute-force attacks by monitoring logs for repeated failures or suspicious activity. It automatically blocks the offending IPs that trigger these patterns, providing enhanced security against unauthorized access attempts.
With Fail2Ban, you can configure various jails to monitor and protect critical services, such as Apache, cPanel, Dovecot (IMAP/POP3), Exim (SMTP), FTP, and SSH. Each jail can be toggled on or off to suit your needs, ensuring targeted protection for your server services. This helps mitigate risks from brute-force attacks, denial of service (DoS) attempts, and connection abuse.

7. Country filtering
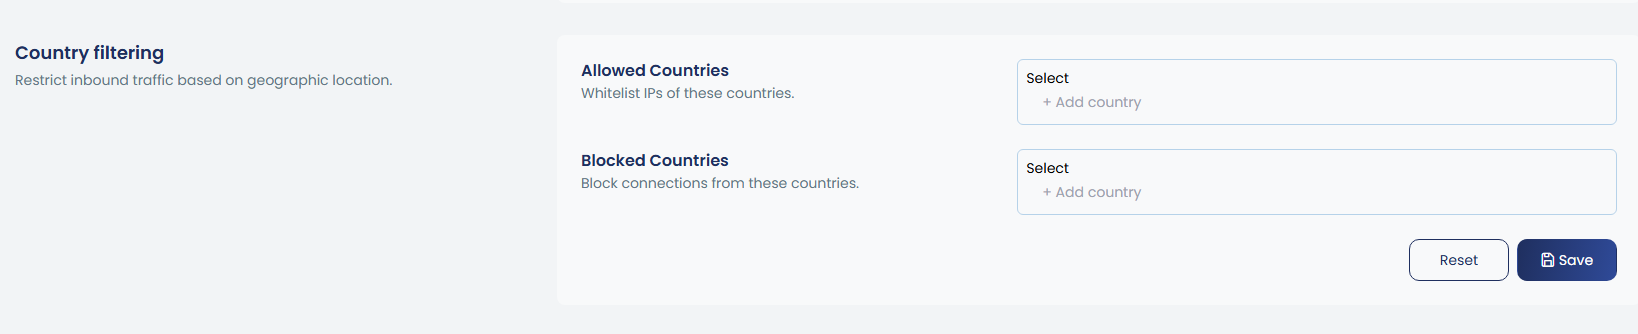
You can whitelist or blacklist entire countries using their ISO codes (e.g., US, CN), with options to add, remove, or view the list of allowed or blocked countries.
cpgcli fw --allow-country CODE |
Whitelist entire country by ISO code (e.g., US, CN). |
cpgcli fw --allow-country --remove CODE |
Remove country from allowed list |
cpgcli fw --allow-country --list |
List whitelisted countries |
cpgcli fw --deny-country CODE |
Blacklist entire country by ISO code (e.g., US, CN). |
cpgcli fw --deny-country --remove CODE |
Remove country from denyed list |
cpgcli fw --deny-country --list |
List blacklisted countries |
8. Port filter configuration
Port Filtering allows you to control inbound and outbound traffic by defining which TCP and UDP ports are permitted. When enabled, all ports are blocked by default except those explicitly allowed. You can manage input and output ports separately for both TCP and UDP, with options to add, remove, or list the allowed ports. This ensures only required services are accessible while closing all unnecessary ports for better security.
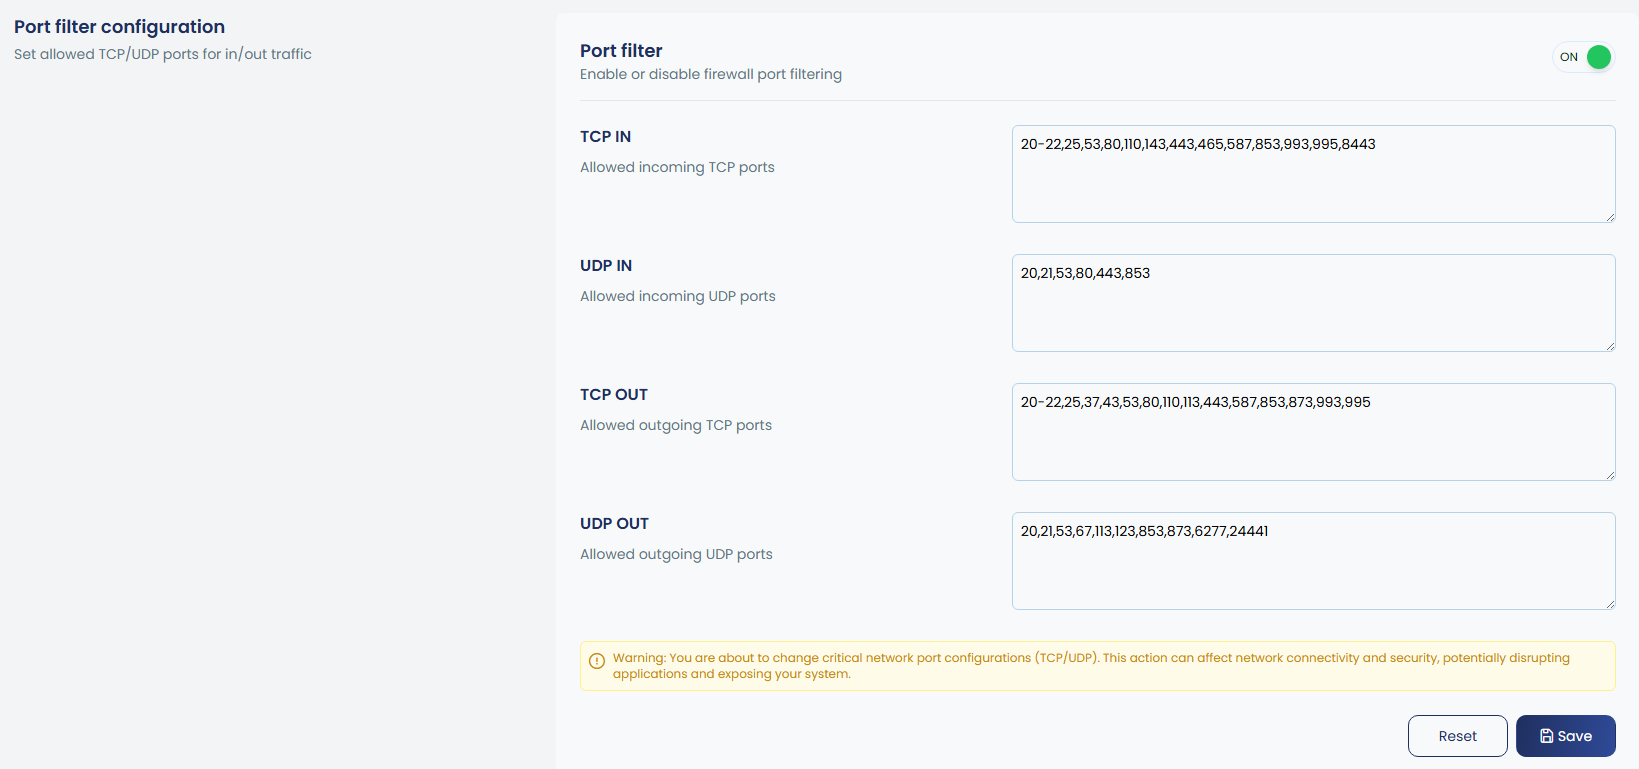
You can enter a range of ports in the input box. To define a range, use a dash (-) between the starting and ending port numbers. For example, 30000-35000 will cover every port from 30000 up to 35000. You can also mix single ports and ranges, like 22,80,443,30000-35000, to allow or block multiple specific ports together.
cpgcli fw --port-filter <options> options: enable|disable|status |
Enable, disable or check Port Filtering status WARNING: blocks all TCP/UDP ports except allowed ones |
cpgcli fw --port tcp-in action |
Add/remove or list allowed TCP input ports |
cpgcli fw --port tcp-out action |
Add/remove or list allowed TCP output ports |
cpgcli fw --port udp-in action |
Add/remove or list allowed UDP input ports |
cpgcli fw --port udp-out action |
Add/remove or list allowed UDP output ports |
| Available actions : –list, –add <port>, –remove <port> |
9. Whitelist/Blacklist Source File
You can manage extended whitelist and blacklist sources by importing IPs directly from files. This allows you to add, remove, or list source files containing multiple IP addresses, making it easier to handle large or frequently updated blocklists and whitelists in a centralized way. The available CLI options are:
cpgcli ip --allow-source path_to_file |
Add IPs from source file to whitelist. |
cpgcli ip --allow-source --remove path_to_file |
Remove source file from whitelist. |
cpgcli ip --allow-source --list |
List all whitelisted source files. |
cpgcli ip --deny-source path_to_file |
Add IPs from source file to blacklist. |
cpgcli ip --deny-source --remove path_to_file |
Remove source file from blacklist. |
cpgcli ip --deny-source --list |
List all blacklisted source files. |
10. DDNS
DDNS is a service that allows you to automatically update the IP address associated with a domain name whenever your IP address changes. This is particularly useful for devices or networks with dynamic IP addresses (e.g., home internet connections or certain servers), as it ensures your domain name always points to the correct IP, even when it changes.
Commands for Managing DDNS:
cpgcli ip --ddns --list |
Lists all the existing DDNS entries in the system. This command helps you view all the DDNS configurations that are currently active. |
cpgcli ip --ddns ddns_name |
Adds a new DDNS entry for the specified ddns_name. This command associates a domain name with a dynamic IP address, allowing the domain to automatically update when the IP changes. |
cpgcli ip --ddns --remove ddns_name |
Removes the DDNS entry for the specified ddns_name, effectively disassociating the domain from the dynamic IP updates. |
11. Compatibility Mode
Compatibility mode uses iptables instead of nftables, which is helpful on systems where nftables is not fully supported or causes conflicts. However, when compatibility mode is enabled, some advanced firewall features may not be available, as those functions rely on nftables.
cpgcli fw --compatibility enable|disable|status |
Switch to compatibility mode (uses iptables instead of nftables) Some firewall features may be disabled in this mode |
Some outdated operating systems or kernels do not fully support nftables. In such environments, the firewall will automatically switch to compatibility mode, which uses iptables instead of nftables.
For users running on newer OS or kernel versions that do support nftables, we still provide the option to manually switch between nftables and iptables based on preference or custom requirements.