
Our control panel provides flexible options for securing your website with SSL. You can choose between free automatic SSL or uploading your own custom certificate based on your specific requirements.
Please follow the steps below to complete the setup:
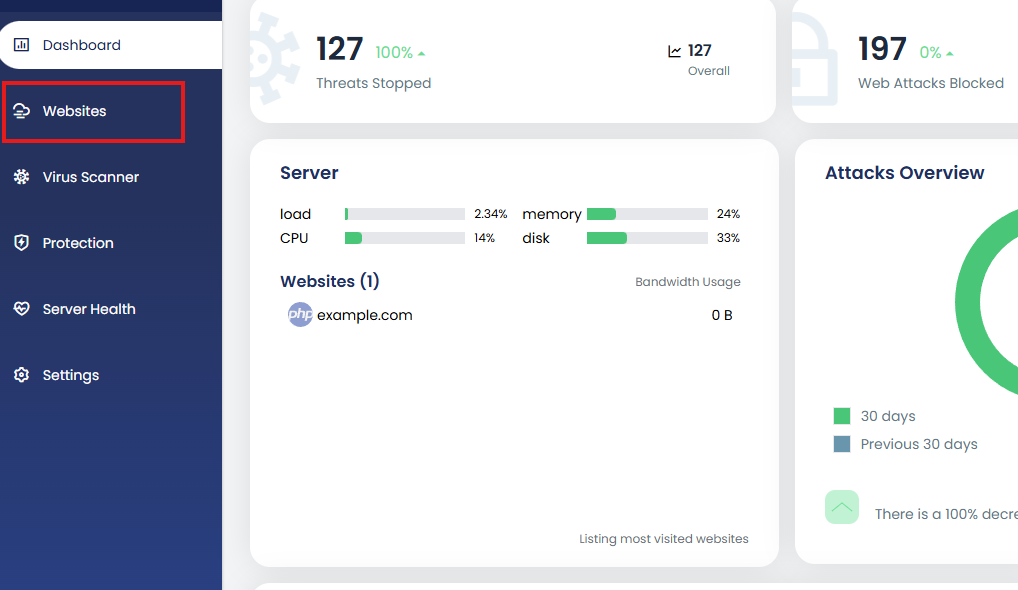
1. Access control panel and navigate to Websites
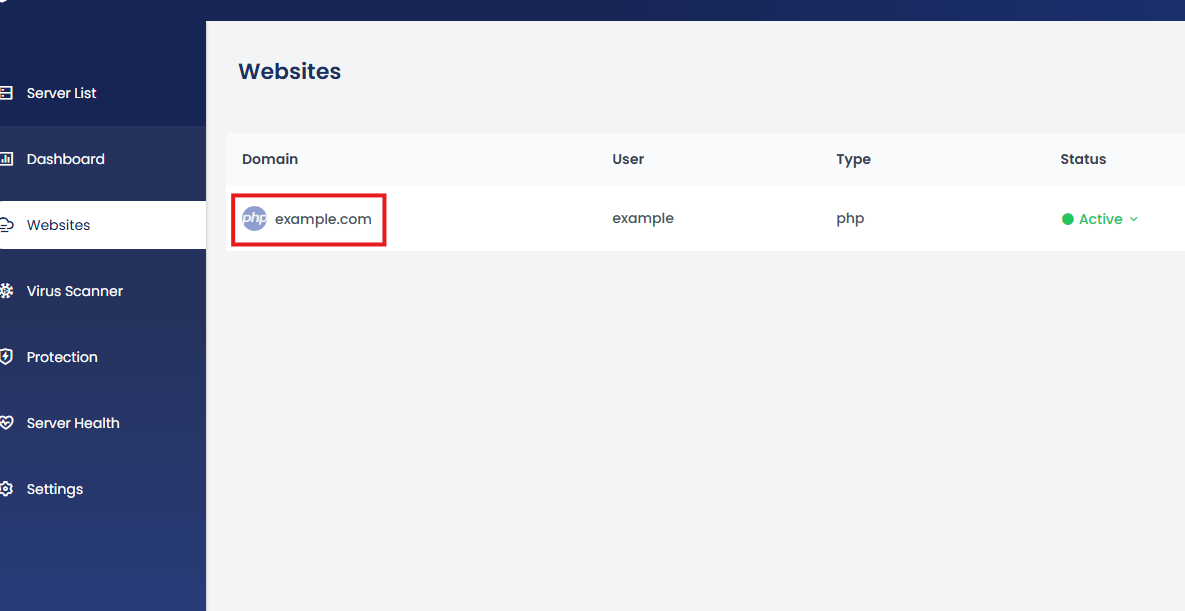
2. Select the website for which you want to update the SSL.
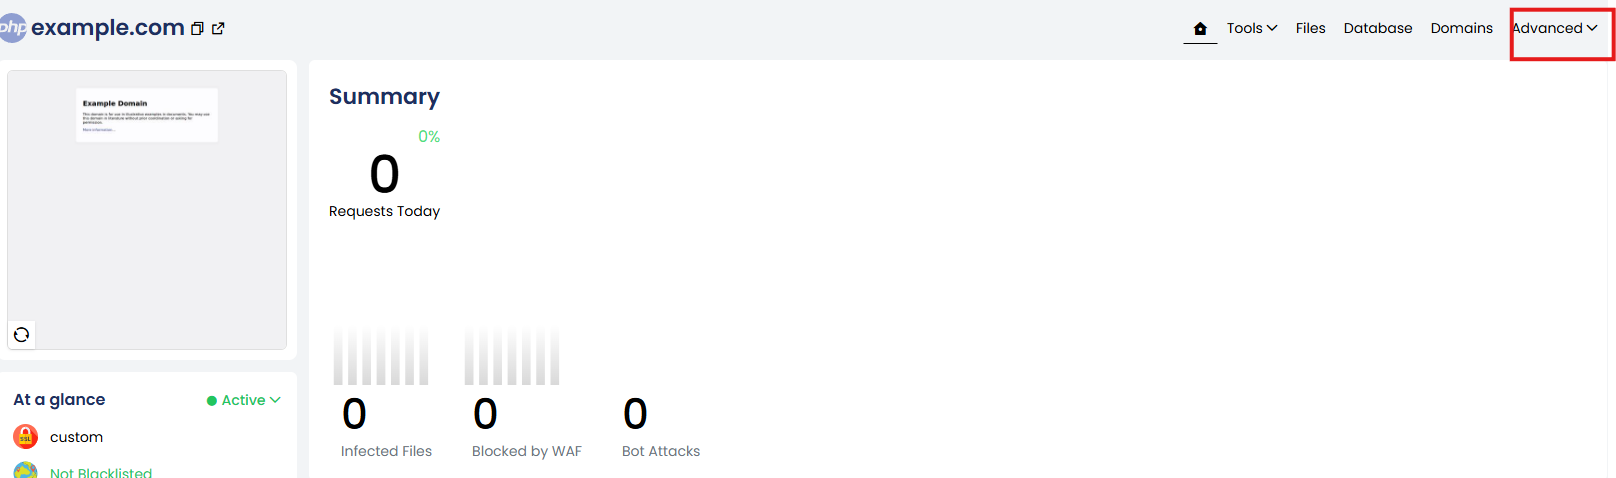
3. You’ll be taken to the website details page. Click on “Advanced”.
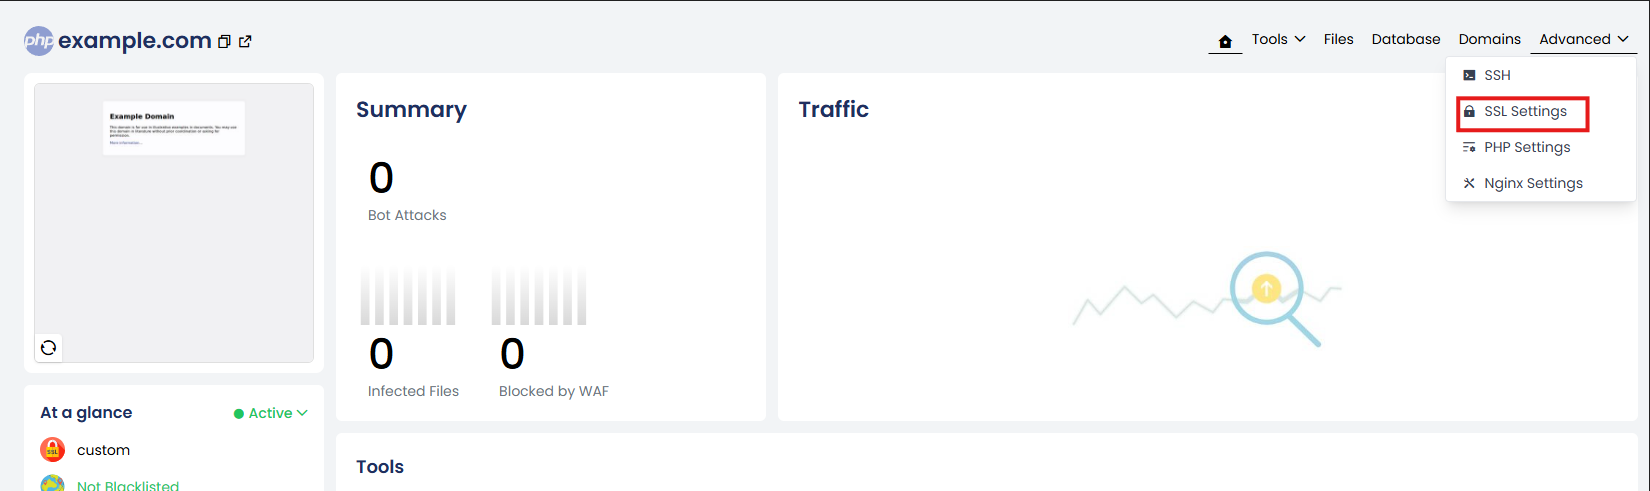
4. From the Advanced drop down select SSL Settings.
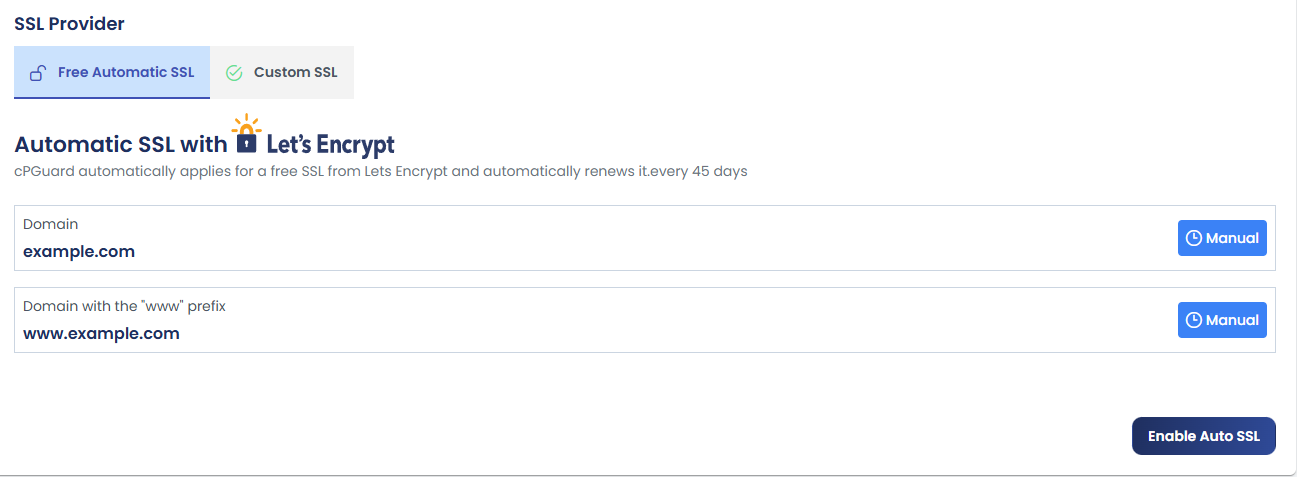
Free Automatic SSL
The system automatically issues and installs a free SSL certificate from Let’s Encrypt, with automatic renewal every 45 days—no manual action required after setup.
To enable Free Auto SSL:
-
Enter your domain name in the provided field.
-
Click Enable Auto SSL.
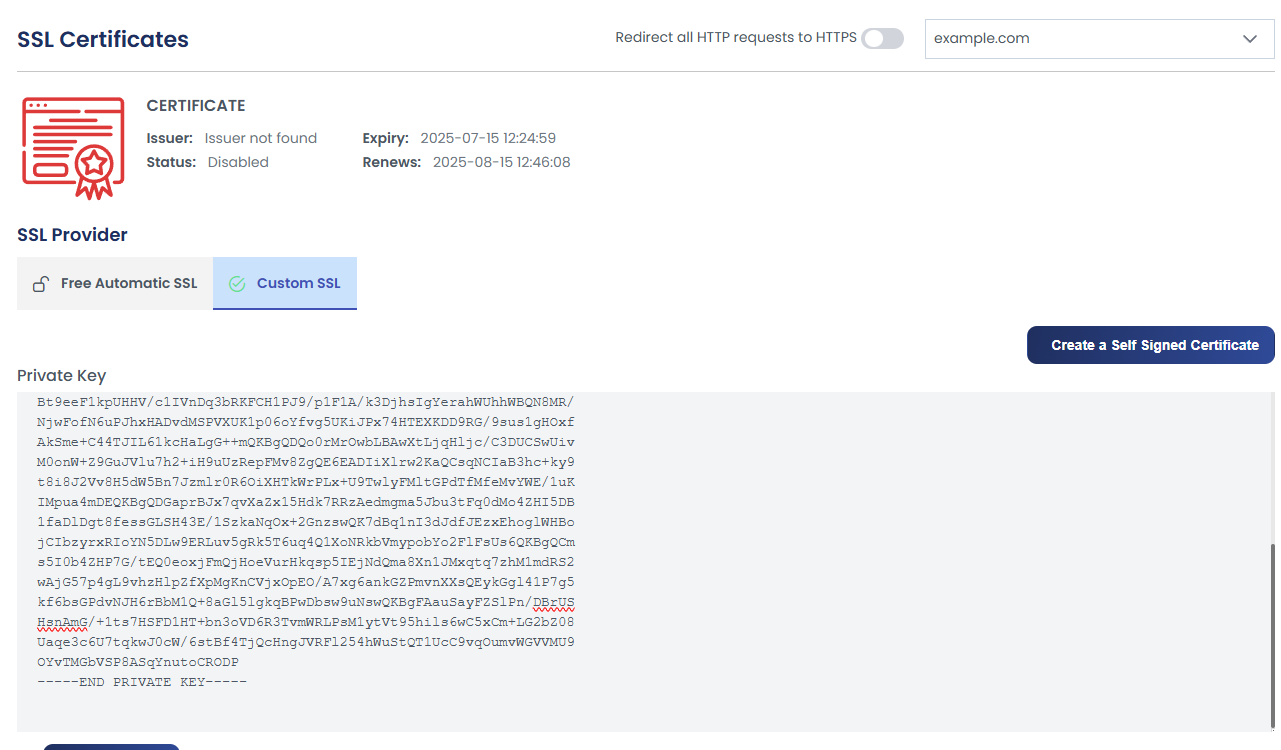
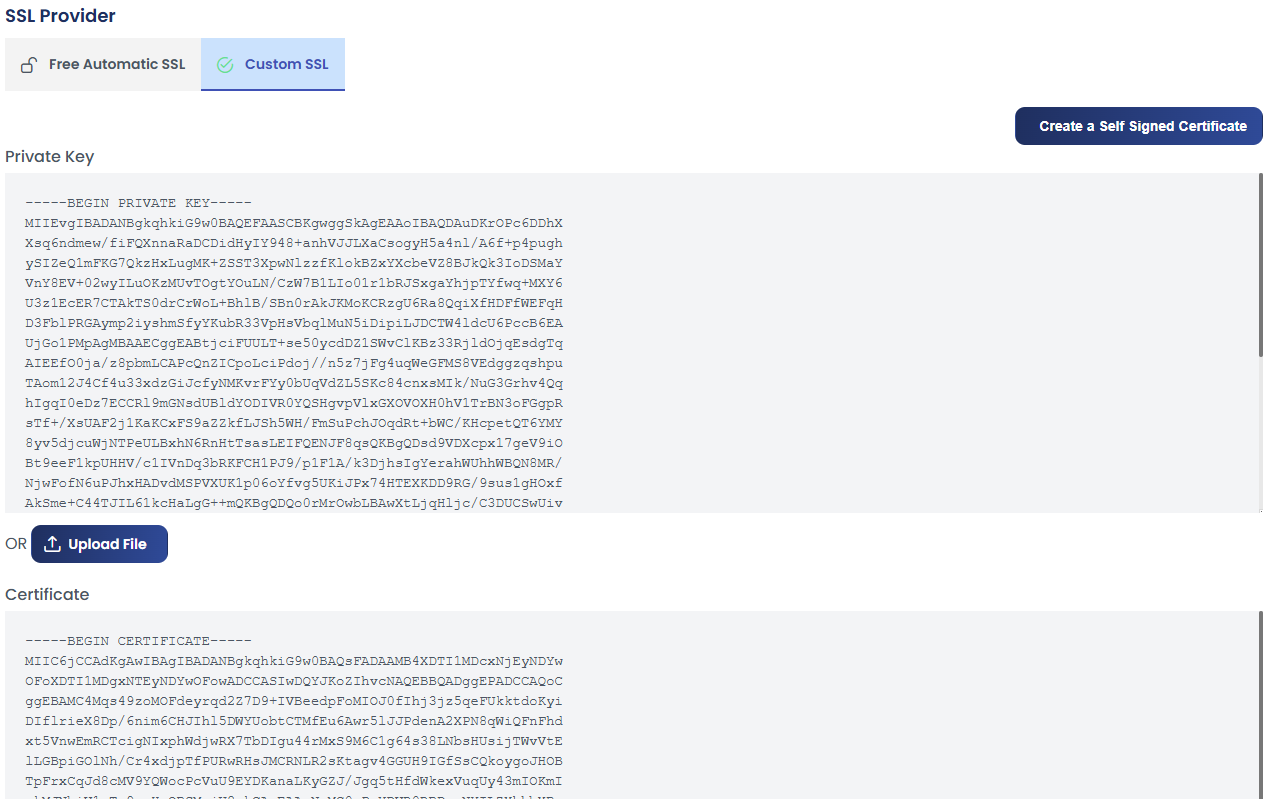
Custom SSL
If you prefer to install your own SSL certificate, the control panel allows you to do so by providing your certificate and private key.
You can either upload the necessary files or paste the certificate and key directly into the provided fields.
Once the information is entered, click Deploy SSL to complete the installation and activate your custom certificate.

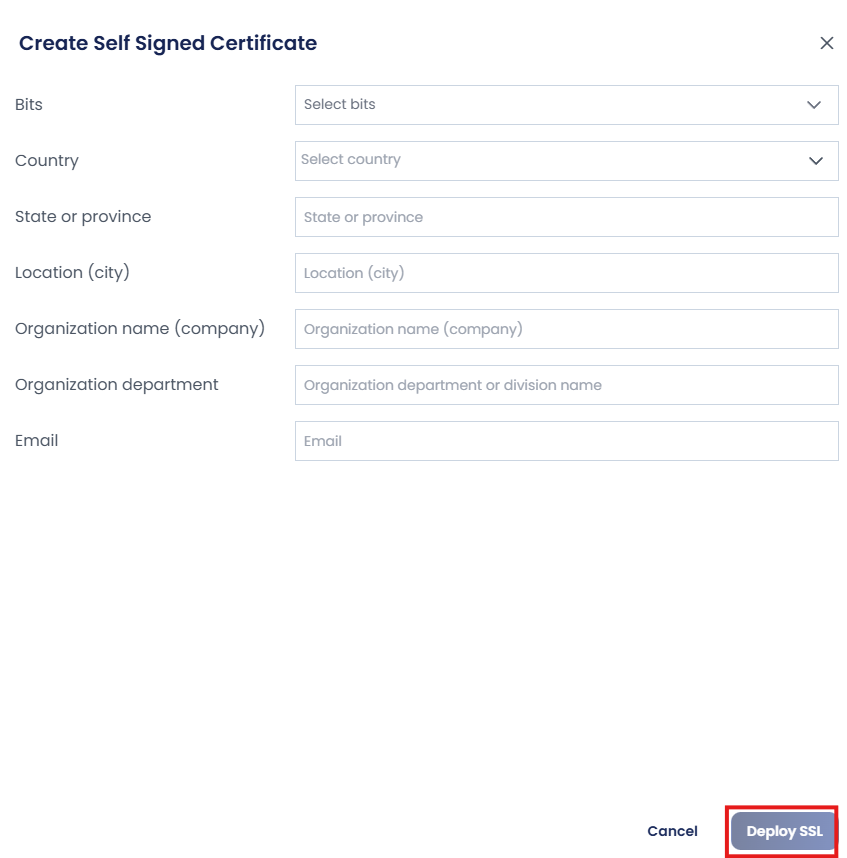
Generate a Self-Signed Certificate
Create a self-signed certificate.
Steps:
-
Fill in the required details (e.g., organization, country).
-
Click Deploy SSL to generate and install the self-signed certificate.
By using either method, you can ensure secure, encrypted communication for your website, improving both trust and compliance with modern security standards.